Learn Digital Photography – Free Fun And Value Approach

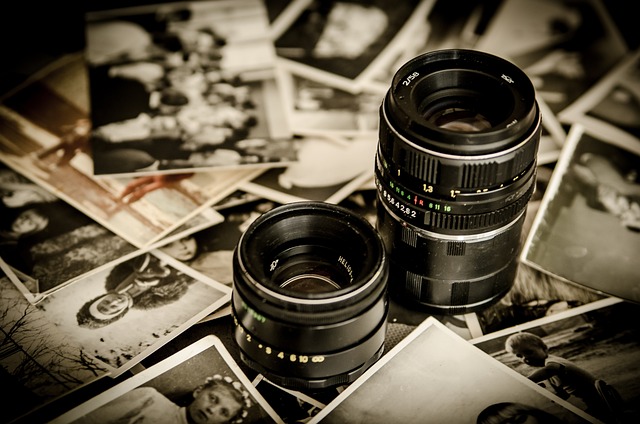
I was having my home treated for termites and the company I used asked if it was okay to take pictures of the orlando termite treatment they were doing to my home. I watched how they setup for the pictures and checked out the equipment they used for the pictures. They were top notch, just like their treatments. Give them a call for the best Orlando Termite Control in the area.

We always ask how can I improve my photograph. Where should I start with? Making sure that my area of work is clean. These are common questions from novice photographers; even experienced photographers would ask how do I know my work is acceptable to meet the taste of the market? In other words, I wonder if the photograph can generate sales instead of collecting dust on the desktop.

The traditional approach will recommend you buy a camera, read through the user manual, go for the tutorials, or even ask you to pay more for a bible photography e-book to learn so-called secret techniques for digital photography. The traditional approach may help but it is passive and is not able to let the photographer discover the value of their work by constructive feedback.

Imagine an active and interactive approach that is free and fun, The photographer receives feedback from various open constructive critiques, and that native approach helps photographers to set the right direction and the point to start with for improving their photography work.

Discover The Value Of Your Photographs

That means as a winner, you may not have the most technically perfect photo, but more people would buy your photo than the others in the contest. I would rather have a photo that sells more often, than one that is technically perfect that collects dust…….

….. the voting is handled by the majority of members. Members from all walks of life and from all over the world, with one common interest (they love photography). What does that mean to you? By having many members from different cultures and ethnic backgrounds you (as an artist) get a real-life critique of your work that reflects the tastes of the masses.

Success Pointers For Winning Photo

Since I registered as a member of POTY in July 2003, I have advanced beyond my wildest dreams in the digital photo world. A lot of my first photos that I entered, never really got good ratings, to no ratings at all. But over time, I looked, listened, observed winning photos, and practiced in all the areas in which I was lacking, and believe me there were lots. Below, I have listed some of the things I have learned here on this forum and I would like to pass some of them on to you and hope you find them useful…….

….. the most important things I can suggest, are to practice, observe, pay attention to constructive criticism, read your camera’s manual, and read anything else you can get a hold of! Photography is a practiced skill! If you wish to improve and strive for that winning photo, you have to make the time and effort.

Creating GIF Animation For Your Photographs

Over the daily shout thread, I’m amazed by Tom’s work on the animation graphics, Many asked how it was done, and his answer was using a GIF extension file. It was mind-boggling at first so I surfed the internet to find out more information about this. There are a lot of GIF animator software available, but many are for trial purposes, and if one is interested he or she may opt to buy the product.

So how to make a static photo somewhat appear to be non-static? For example, how to make an animal eye in a static photo blink? Or perhaps, how to continuously make lighting level change in a static photo? And of course many more……

To answer those questions, I downloaded one particular software, and after figuring out how to use it, it ran perfectly as per plan but the setback was it put up its brand name on the finished product. This is something that I hate! But one thing good is that I learned the basic things about animation. It utilized a GIF extension file and timed the frame to frame into either a single loop and stop or continuous looping. This opened up a new door for me. Yes if we want a moving picture we might as well do some video shooting! But that’ll consume too much memory space and I believe nothing really special about it either.

I have Adobe Photoshop CS2 and Adobe ImageReady CS2 on my PC for my photo editing, and frankly, the ImageReady was not being used at all! So after having some basic knowledge about animation graphics, I found out that Photoshop itself has that feature, After a lot of time spent on it, I figured out the use of the animation button at the top right of the editing screen of Photoshop, the best thing is one may add up frame by frame from the layers created, and specifically altered individual layers by selecting the specific frame! So the other layers will not be shown on the main display, with less interference on editing only that particular layer that we selected.

From there, we may choose the delay timing of playing the individual frame on the main display, and after we are satisfied with the output we may save the file. I’ve tried to save the file under the GIF extension here but when I open it up again using normal photo viewing software, the photo simply does not animate! The same goes when I opened it using Photoshop… mmm… what is wrong? So I opted to save the file under PSD extension, (the normal extension of Photoshop editor) as expected the photo will animate only if opened using Photoshop itself. What next?

Somehow out of curiosity, I opened the file under the PSD extension using ImageReady, and to my surprise, it contained a graphic optimizer, and straight away The animation bar appeared on the lower screen with the main display showing the original, and optimized GIF, 2-up, and 4-up. When I clicked 4-up, the main display subdivided into four screens with three showing GIF optimizer and the original one on the first screen. When I clicked play all four started to animate, and one may see some reduction in output quality on the files which was being optimized. I clicked the fourth one and saved it under the GIF extension file.

Yahoooooooooooooooooo…. the photo animated by itself even when I re-open the GIF extension file using ordinary photo viewer software!!!!!!

Photographs – Ten Tips For Getting Good Shots

I was taking pictures of the technician from Orlando Wildlife Removal. He was removing a racoon from my attic. Give them a call if you want the best Orlando Wildlife Removal. He said he wanted copies because they were the best he had seen. Taking effective photographs often requires patience and practice but is a valuable skill to acquire.

A newsworthy or unusual photograph can add to a story and enhance your message. Often a story may be run purely because it has a great photograph or a front-page photograph will have its accompanying story a few pages back.

Good media relations practitioners should always be on the lookout for good photographs. When planning a media event, always keep in mind options for good photo opportunities.
This is especially true for television, where moving visual pictures are essential for the story.

Digital cameras and editing software made taking and distributing photographs a lot cheaper and easier.
Whether you are taking photographs yourself or employing a professional photographer, keep these tips in mind to make your visual images more effective when trying to communicate your message.

  1. THE SET-UP.

Avoid busy, cluttered backgrounds that may detract from your subject. Remember that people often scan newspapers, sometimes whilst preparing for work or commuting. Make your picture interesting without being too cluttered, and showcase your subject in the picture.

  1. THE PEOPLE FACTOR.

Don’t photograph subjects head-on. Shots taken from a slight side angle are more natural. Research has shown people like to look at other people, try to include a person in all your pictures where appropriate.

  1. KEEP IT NATURAL.

Candid shots of subjects are better than posed “mug shots”.

  1. FRAME IT.

Too much space around a subject can be distracting. Try to keep your shots tightly framed without cutting parts of your subject from the picture. Seeing a person’s head trimmed in a shot isn’t appropriate or favored by the media.

  1. AVOID ROWS.

Photograph a group in a natural cluster, never in a stiff row.

  1. KEEP IT SIMPLE.

Avoid the temptation to photograph too many people in a group. Remember the focus of your article.

  1. FOCUS ON FACIAL FEATURES.

Generally, faces should be at least as large as the nail on your little finger.

  1. ALWAYS PROOF.

Ask for proof sheets from the processor before selecting negatives for printing. Better still with digital cameras, check your shot before saving. Be mindful of blurring because when the shot is printed any blurring is worsened and may ruin your shot.

  1. BUILD RELATIONSHIPS.

Make sure people in your photographs receive copies. It’s a really easy simple gesture that lets people know you appreciate their help.

  1. ASK PERMISSION.

Always ask permission to take photographs of subjects used for publicity purposes. Always obtain a release, even for internal publications and file photos.

Photographing Couples

Your sisters getting married, your daughters getting engaged, or you’ve been picked as the best man in your friend’s wedding. What these scenarios have in common is that they all need a good picture of the new couple to hand out to friends and relatives. Studio pictures are fine, but a good, flattering candid is better.

First, advise the couple to wear a sweater or blouse with no pattern and with sleeves. Dark colors produce a low-key photo that emphasizes the faces with contrasting tones.


Medium subtle tones are safe but boring. High-key portraits require light pastels or off-white. Round necklines are to be avoided. Shiny materials photograph well and textured sweaters :(not a pattern) add interest to a portrait without taking over.

When planning your shot, think in terms of diagonals. If you draw a line from one nose to the other, it should form a diagonal in the picture. An ideal relationship between two faces is one in which the man’s eyes are even with the woman’s mouth or vice versa. Hand position is very important to the composition. She can go behind him and hug him, clasping her hands in front. Always be sure to show the ring. She can place both hands on his shoulder and lean on her hands. He can sit on the floor and she can put her head on his shoulder.

The pose should be natural and fun, as long as the rules of composition are followed: heads close or touching, the woman’s hands viewed (edge on 0, the eyes approximately one-third of the way from the top of the photo, and both subjects looking in the same direction or at each other. When centering a couple in the frame, measure an equal distance from the eyes, not from the shoulders. Cropping looks best when centered just below the elbows or at the waist. Never crop at the wrist or ankles. Keep up a steady stream of conversation to put the couple at ease and to prevent eye blinks, distracting them from the moment of exposure.

Indoors, window light is the most flattering light and quite dramatic at the same time. Only the lower window should be used for the portrait. The light from the upper panes should be blocked out so as not to produce dark eye pockets. A reflector can be used for lightening the dark side of the picture. Any white surface will do a tablecloth, a white towel, or a silver professional reflector if you have one.

Expressions can range from a nice smile to a serious one, as long as both subjects agree on the mood. Take a few pictures of the couple looking at each other. Touching is nice: he can lift her chin for a kiss or she can touch his cheek tenderly with a serious expression.

Outdoors, and woodsy pictures work well, especially when photographed at the edge of the woods in the early evening light. Indoors, the flashlight bounced to the side and back with an open lens creating a wonderful portrait effect. Be creative it’s not as difficult as you think!

Community Photography

There are many families out there who cannot afford to go to a regular studio for a family portrait. Department store and discount studios cannot handle groups of more than three or four and their photographers are often young and inexperienced for the difficult task of large group photography.

One answer is for a small studio to contact a local community such as a Lake Association, a Rotary Club, or any other organization that promotes a family lifestyle. Your deal to them is that you will photograph all the families in their organization who wish to have a family portrait. A couple of club volunteers can make the appointments fifteen minutes apart on a single day, preferably on a Sunday. Two fifteen-minute sessions can be awarded to extremely large groups. You may want to reward their help with a free set of portraits and a substantial donation to the club treasury.

Large groups are to be encouraged since you stand to make more money with large families. Wall portraits are to be preferred with large groups and breakdowns can swell the order appreciably. Pricing generally is half of the studio rate with no session charge. An eight-hour day can accommodate about thirty families. Generally, the end of summer is the best time for family portraits since the kids are back from vacation and new clothes are available.

Most communities have a community hall available for portraits if reserved well in advance.

A sample table containing all the sizes with several wall portraits on easels should greet the family on Portrait Day. Avoid using head close-ups in your sample pictures. Several chairs for waiting for clients and a check-in booth will expedite flow.

As to equipment needs, a large (12′ x 21′) muslin background with attendant supports, five lights, a tripod, and a camera is all that are needed. One softbox main of 200 watts, one umbrella fill of 100 watts, one 100-watt hair light with boom, and two 100-watt kicker lights for an evenly lit background are needed for quality work.

I recommend photographing a name and session number included in each session for ordering ease. Packages range from one eight by ten and two five by sevens to ones including an eleven by fourteen and many eight by tens, five by sevens, and wallets. Four-by-sixes should not be available since they are large enough to take the place of five-by-sevens and also they look like the snapshots they get from their cameras. Wall portraits should be treated individually and priced accordingly with and without frames. Delivery is cost-effective with all photographs placed in a large paper bag with your logo on the front. You should be able to qualify for reduced rates from the print lab.

To make money at this, you must use a good family portraitist who can work fast and neatly. Pay him or her well. Two photographers work well, offering breaks and lunch times for less stress. Breakdowns should be encouraged – for instance: a family of two adults, three children, three grandparents, and a dog should be photographed like this. Six photographs of the whole group (first), six photographs of two different poses of the family of five, three shots of the parents, six shots of the three children, two shots of each child, three shots of one pair of grandparents, and three shots of the single grandparent. One photograph of the mother with her parent(s) and the same for the father. These breakdowns will be irresistible to the client and will multiply your orders dramatically. I advise you to ask the mother for any special requests for poses. They are often shy to ask about a special grouping or pose. Remember, this will result in a guaranteed sale.

These community photograph sessions can result in the addition of many regular clients for your regular studio during the year. The sessions can be rotated between three different community clubs to give the children a chance to grow and change sufficiently for the necessity of a new family portrait.